Channel SDK Quick Start
In this Quick Start, we are going to help you start using the Channel SDK by first creating a channel for your source to connect to. Without a channel to connect to, you will not be able to configure the Send API to send to agents. Let's get started.
Create an Engage Digital Channel SDK
For this Quick Start, we need to create a channel and then assign an agent to that channel. There are several steps in this process starting with the community.
Create a Community Profile
Communities are databases of identities associated with each channel. Identities allow agents to post messages to various channels in the platform. Before you create a channel, you must create a community for each type of channel being used. You can learn more about Communites from our support pages.
To get started navigate to Channels->Community profiles to see your current community profiles. Here you will add a new community profile for the Channel SDK.
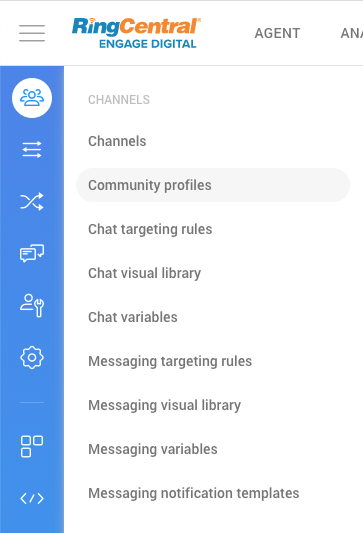
Click Add to add a new community profile and select SDK.
![]()
Give your community profile a name, like test-source-sdk. Make sure the community profile is active by checking the box for Active, and Save your new community profile.
Create a Channel
The next step is to add a channel to your new Channel SDK community profile. You can learn more about Channels in our support pages.
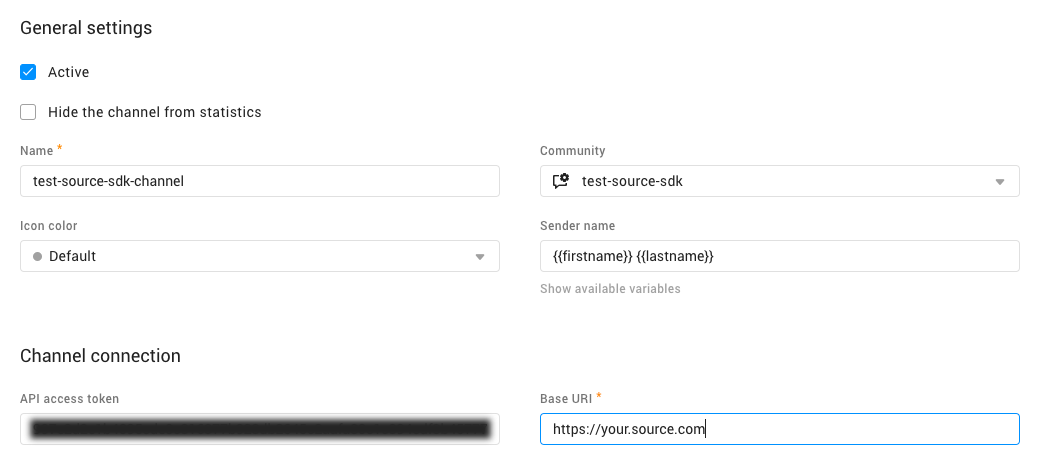
To create a channel navigate to Channels->Channels to see a list of your current channels. Here you will add a new channel for your Channel SDK integration using the Channel SDK community profile. This new channel will be an Engage Digital channel SDK.
![]()
Enter the follow required fields:
| Field | Value |
|---|---|
| Active | Make sure this box is checked to indicate your channel is active. |
| Name | Give your channel a name. In our example, we are using test-source-sdk-channel. |
| Community | Select the community profile for your channel. In our example, we are using test-source-sdk. |
| Base URI | This is the endpoint for the source you are wishing to send messaging data to, that originate from the Engage Digital platform. |
| API access token | Take note of this field as you'll need this token to verify your send requests to the channel. |
Now click Save to save your work and channel.
Note
While you are saving your configuration, you may note that a message comes in to your Base URI. This message is the implementation.info to initiate the dialog between Engage Digital and your source. Each time you save your channel, this implementation.info message will go to your Base URI.
In order for your integration to start working, you'll need to follow the next couple sections including a response to the implementation.info.
Set Agent Permissions to the Channel
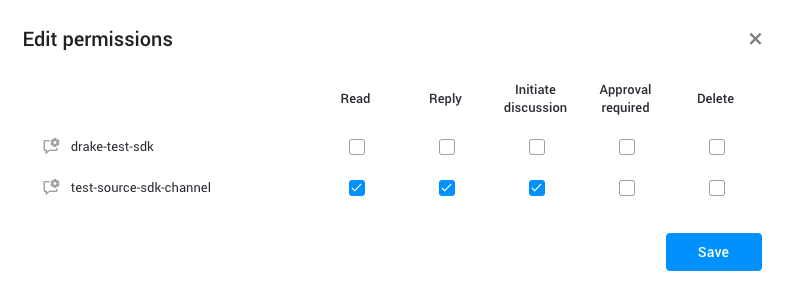
For agents to interact with messages from a channel, make sure to set the proper permissions for that agent. In this instance, you are making sure your agent has read and reply permissions. Just check both boxes to make sure your agent can receive and respond to messages.
Configure Channel Group
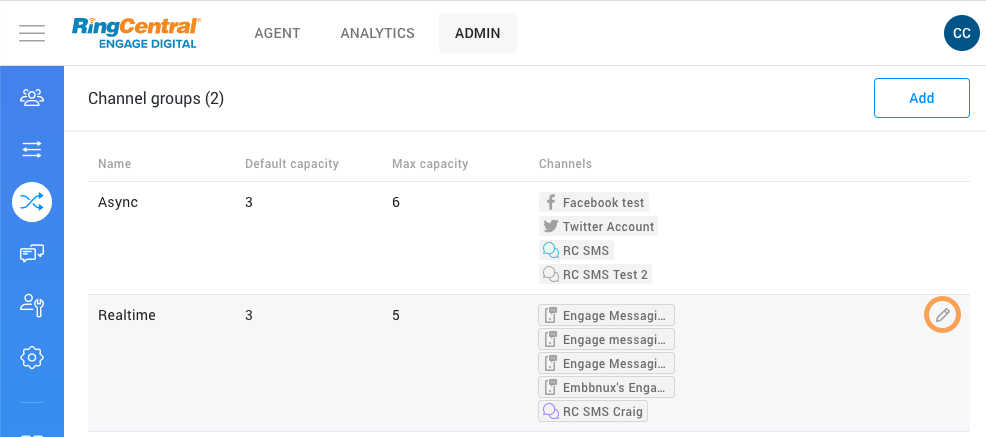
There are three types of channel groups: asynchronus, real time, and triage. For our testing purposes, we want real time, but for some interactions, the channel group could be asynchronus. Find the channel group settings under Routing, and then configure your channel group.
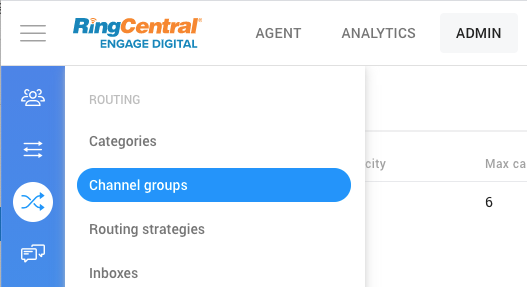
Now let's add our Channel SDK Channel to the real time channel. First click the pencil icon to edit the real time channel.
Note
These channel groups can be renamed to a custom name and may not be the name used for the real time mode. For our Quick Start, we are using the default channel group name.
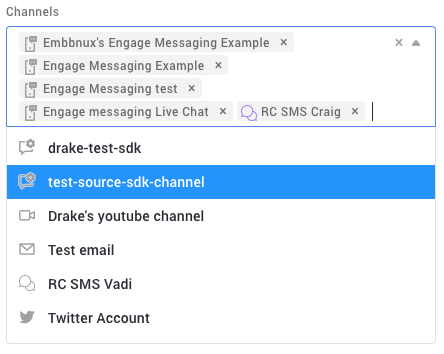
Then add our Channel SDK Channel in the Channels field by selecting it from the dropdown.
Now we are setup in Engage Digital with a Channel SDK Channel and our Agent assigned to the channel so they can receive messages from your source. The next step is to connect your source, which is initiated from Engage Digital. Once you have your Base URI ready, move on to the next section.
Creating a Source for Engage Digital
Signatures for Requests and Responses
Please note that all requests and responses generated on your side must be signed according to the algorithm described in our Request and Response guide. Place this signature in the custom HTTP header X-SMCCSDK-SIGNATURE. This signature is also included in each request you receive from the Engage Digital platform. It is good practice to verify the signature to ensure the messages are coming from the Engage Digital platform.
Note
It is also possible to send the signature as a Query parameter to avoid proxy header filtering. For example http://{your-domain}.digital.ringcentral.com/realtime/sdk/{your-source-id}?signature=xxxx
Polling to Start Integration - The implementation.info Request
The starting point for any communication between your source and the Engage Digital platform is via implementation.info sent through polling. This request, sent from the Engage Digital Platform upon saving your Engage Digital Channel SDK channel, allows you to respond to Engage Digital of the requests that you wish to manage on your side within your integration (message creation, thread creation, etc.) This request is made at the creation of the source (once you click "Save") on the Engage Digital side.
Important
You must submit this request correctly or you will not receive any other request for message synchronisation or message creation.
You must therefore respond to this request with the actions you wish to support, like this:
Response from You
{
    "objects": {
        "messages": ["create", "show", ...],
        "private_messages": [...],
        "threads": [...]
    },
    "options": ["messages.no_title", ...]
}
In this example the integrator wants to manage messages, private messages, and threads. There is also an option to specify that messages do not need to have a title.
In the case of integrating a third-party chat solution, you have two integration options:
- Use private messages In each message sent to Engage Digital you must specify an
in_reply_to_idparameter to indicate that this message is in response to the one targeted via this id, thus allowing the message to be forwarded to the correct discussion thread on the Engage Digital side. To do this you must be able to send us the id of the message you are replying to. - Use messages In this case, there are two solutions:
- If you support the option
messages.unthreaded, when you reply to the requestimplementation.infothen it is the same system as for private messages. The link between each message is managed via anin_reply_to_idparameter. - If you don't support this option you can manage the link between the different messages via a
thread_idparameter which allows you to bring the messages up in the same thread. In this case you must integrate the threads object in your response to theimplementation.inforequest.
- If you support the option
Examples of a Response to the information.info Request
For a private messages integration:
Response from You
{
    "objects": {
        "private_messages": ["create", "show", "list"]
    }
}
For a messages integration with option messages.unthreaded:
Response from You
{
    "objects": {
        "messages": ["create", "show", "list"],
    },
    "options": ["messages.unthreaded"]
}
For a messages integration without option messages.unthreaded:
Response from You
{
    "objects": {
        "messages": ["create", "show", "list"],
        "threads": ["create", "show", "list"]
    }
}
See Actions to learn more.
Two Working Models for Interaction
The Channel SDK offers two working models:
Standard Polling Query
In a second step, we have to implement the response to the different queries supported in the implementation.info. In the case of asynchronous integration required polling synchronization, please follow all the steps described in the dedicated parts of the Channel SDK as follows:
In the case where the integration will only be in real time you don't need to fully implement polling:
- For list type actions you must simply answer with []
- For show type actions you must simply answer with {}
- For create type actions, you must simply reply with {"id": id of the content generated on your side}, this allows you to manage the agent replies sent from the Engage Digital console.
Real Time Query
In the case of real time integration, once polling has been implemented, it is necessary to manage the sending of customer messages in real time from the third party application to Engage Digital. To do this it will be necessary to set up a create type request on an endpoint provided by RingCentral. See the Send API for more details. Create a request structure as shown below.
To create a message in real time from the third party:
Request from You
{
  "action": "messages.create", // or private_messages.create
  "params": {
    "id": "890",
    "author": {
      "id": "666",
      "created_at": "06/11/2017",
      "screenname": "John Doe"
    },
    "body": "Awesome post !",
    "thread_id": "42"
  }
}
All the dedicated parameters for Message, Private Message, and User objects are available in the online documentation:
If you want to manage attachments using the Channel SDK, you can use the dedicated attachments parameters available on both objects. In this case, it is not required to specify a content body. You can only send the attachment if you want. Attachments must be specified using a direct url or a Base64 content.
Creating a message with attachment in real time from a third party:
{
  "action": "messages.create", // or private_messages.create
  "params": {
    "id": "890",
    "author": {
      "id": "666",
      "created_at": "06/11/2017",
      "screenname": "John Doe"
    },
    "attachments": [
      {
        "url": "https://spuyet.io/small.mp4",
        "type": "video"
        },
        {
          "url": "https://spuyet.io/Meatysticker2.png",
          "type": "image"
        }
    ],
    "body": "Awesome post !",
    "thread_id": "42"
  }
}
Channel SDK supports the following type of attachments:
- audio: aac, mp3, ogg, m4a
- excel: xls, xlsm, xlsx, xlc, xlt, xltm, xltx
- image: bmp, gif, jpg, jpeg, png, svg, webp
- message: eml, msg
- pdf: pdf
- presentation: key, odp, otp
- powerpoint: pps, ppt, pptx, pot
- spreadsheet: numbers, ods, ots
- text: csv, txt, log
- video: avi, flv, m4v, mkv, mov, mp4, mpg, mpeg4, qt, wmv
- word: doc, docm, docx, dotm, dotx
- word_processing: pages, odt, ott, rtf
- other: amr, dms, vcard, tif, tiff, mpeg
Note
Size of attachments is limited to 10Mb
Content Categorization
It is possible to manage thread categorization from the Channel SDK, a categories field is available for Message and Private Message objects. Using this field you can send the external categories applied on the third party side to Engage Digital. On the Engage Digital side it is possible to set up recategorization rules via the rules engine in order to apply a specific categorization according to the information received from the Channel SDK.
You can specify any value in this field. A mapping will be set up on the Engage Digital side to match the values received via the Channel SDK with existing categories in Engage Digital.
Remember!
Remember to pass this information to your Engage Digital project manager so that he or she can set up the category mapping.
Note
This field is case sensitive, please don’t use uppercases or special characters.
Send Context Data
It is possible to send context data via the Channel SDK. This context data can be transmitted via the Message, Private Message or User objects. The context data linked to Message and Private Message objects will be associated with the thread on the Engage Digital side and will be displayed below the imported messages. The context data linked to the User object will be synchronized with the customer record on Engage Digital side.
It is recommended to use the Message and Private Message context data for session related information (i.e. page url, shopping cart amount, detected intention, ...). On the contrary, the User context data should be used to enrich the customer record on the Engage Digital side, they should only include information related to the user.
You can specify any value for this context data. For the user context data, a mapping can be set up to synchronize this data with existing fields in the customer record or custom fields created specifically for this purpose. Concerning the Message and Private Message context data, automatic rules can be set up according to the received values in order to apply specific behaviors.
For more informations regarding the Message / Private Message and User context data, you can check the online documentation:
User Management - Agents Replying to Channel SDK Messages
If you need to create agent messages directly via the Channel SDK (import of already existing messages, bot directly connected to the Channel SDK, ...), you can specify that the user linked to the message must be considered as an agent on the Engage Digital side. For this there is a puppetizable field that can be set in the User object, you have to set it to true for users that should be considered as agents and to false (default value) for customers. This will ensure that messages will be correctly recognized in the Engage Digital GUI.
For more informations regarding User puppetizable field, you can check the online documentation:
Important
You need to set the puppetizable field one time at the beginning of the project to create an identity used by all the agents to reply on the Channel SDK channel. This is a requirement to enable agents to reply from the Engage Digital console.
Enabling agents to respond to messages coming from the Channel SDK integration will need a few things setup to operate the way you want it to. First you need to initialize an agent with an initial request to create a user identity. As stated above, you will need the puppetizable field set so you can create an identity that is controlled by your agents. Let's start with the first message you send to Engage Digital.
{
    "action": "users.create",
    "params": {
      "id": "1234",
      "firstname": "Elliot",
      "lastname": "Alderson",
      "screenname": "Mr. Robot",
      "puppetizable": true,
      "created_at": "06/11/2017"
    }
}
The initial request you send to Engage Digital is a request to identify the agent in the source. Use the above JSON body in your request to Engage Digital with some key notes:
- The
idis unique to this agent/bot. Make sure this is the ID you want the agent to pickup. - This user needs to be managed by the agent in Engage Digital. This mean you must set
puppetizable:truefor the next step.
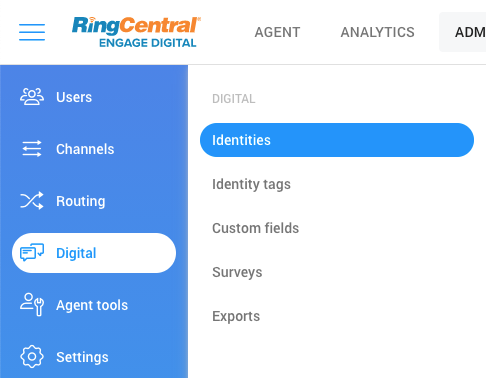
Once you send this request, a new user identity is created. You'll find user identities under "Digital"->"Identities".
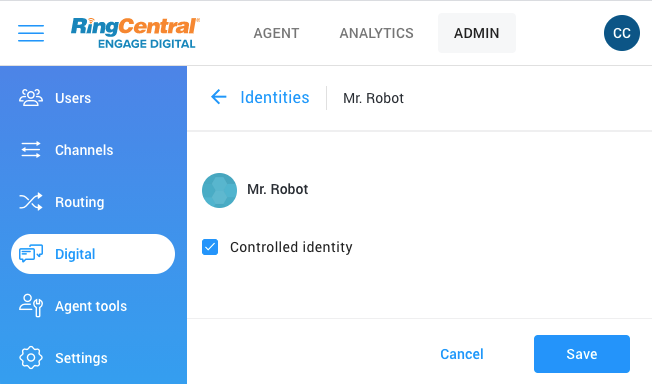
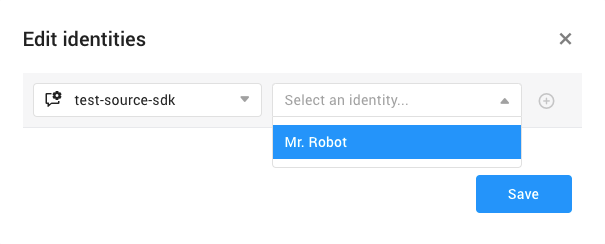
Then you can select the user identity you just created.

Check the checkbox to make this a controlled user identity.
And finallly assign this identity to your agent by going to "Agents" and selecting the agents you wish to assign this identity to so they can respond.

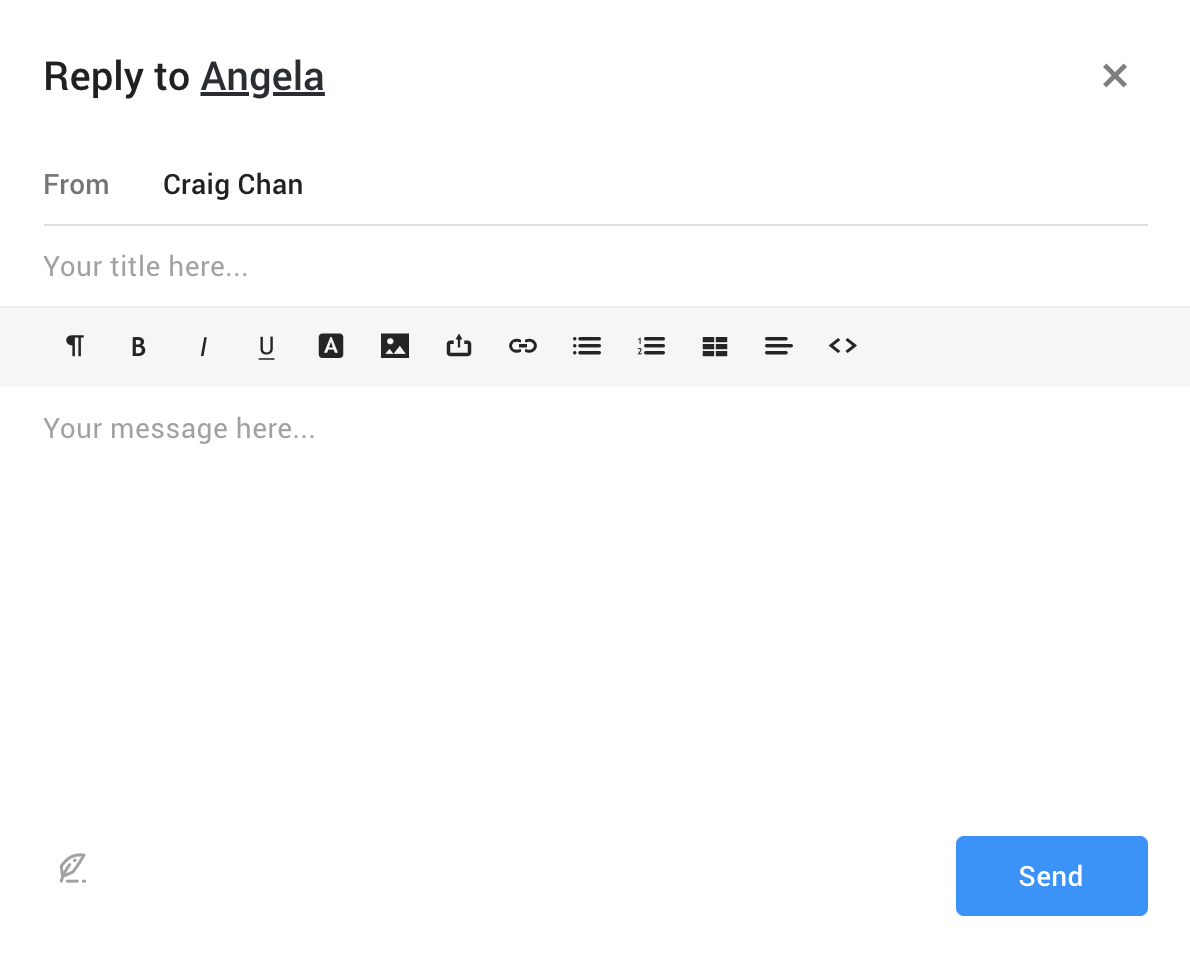
You'll do this for each agent you want to respond to messages from this Channel SDK. Now your agent(s) can reply to messages, but there's still a few more steps. By default, agents replying to messages through the Channel SDK must click "Reply" and type their message in a pop-up window.

A modal dialog box will pop-up for the agent to respond.
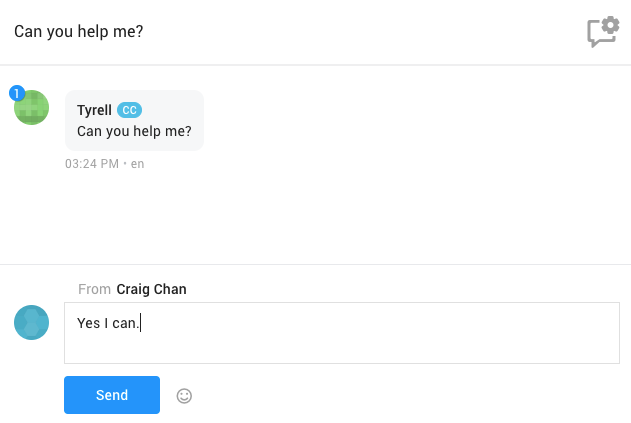
This is the default experience for agents. If you want have an inline experience with simple text responses, you need to make sure the response to the implementation.info specifies those options. The follow JSON response shows an example of using view.messaging to have a respond box appear at the bottom of the threaded conversation and messages.text simplifies the respond box to simple text.
{
    "objects":
    {
        "messages": ["create", "show", "list"],
    },
    "options": ["view.messaging", "messages.text"]
}
Then your agents can respond with this familiar look and feel.
Now when an agent responds to a message, that message will be sent to your Base URI endpoint. When you receive this message, the message will be in JSON format like below.
{
  "action": "messages.create",
  "params": {
    "author_id": "1234",
    "body": "Yes I can.",
    "created_at": "2021-05-13T01:23:25Z",
    "format": "text",
    "in_reply_to_id": "132",
    "sender_name": "Craig Chan",
    "thread_id": "23456",
    "title": null,
    "updated_at": "2021-05-13T01:21:25Z"
  },
  "time": "2021-05-13T01:23:25Z"
}
We need to confirm the message was received by a response from your Channel SDK. Create a response with the following in the JSON body.
{
    "id": "132",
    "body": "Yes I can."
}
Notice the id is the in_reply_to_id sent to you and you are just mirroring back the message body.